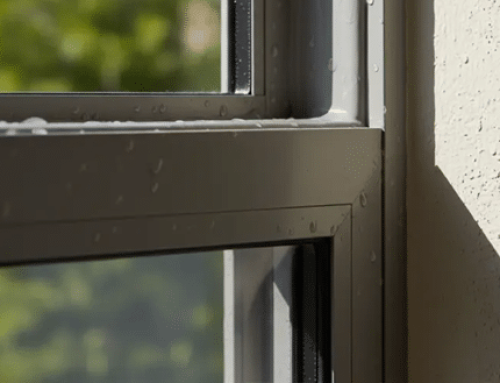
This XtraFlash™ Membrane flashing installation guide is intended for use when a weather resistant barrier (housewrap) is to be applied after window installation and the head, sill and jamb flashing will be applied over the face of an integral mounting flange on the window (i.e. Method A in ASTM E2112, AAMA2400-02). Other installation methods may be employed. In all cases the installer should refer to the window manufacturer’s installation instructions, as well as, local building codes and best practices for window and door installation techniques.
Prior to the installation process, the XtraFlash™ Membrane flashing materials can be pre-cut using the rough opening (RO) dimensions and formula in the following table. Surfaces should be clean and free of debris and dust. Install on a dry surface without ice and snow. Cover within a 6 month time frame.
- Easy Installation
- Superior Durability
- Compatible with all Standard Windows & Doors
- Protects against Water Intrusion
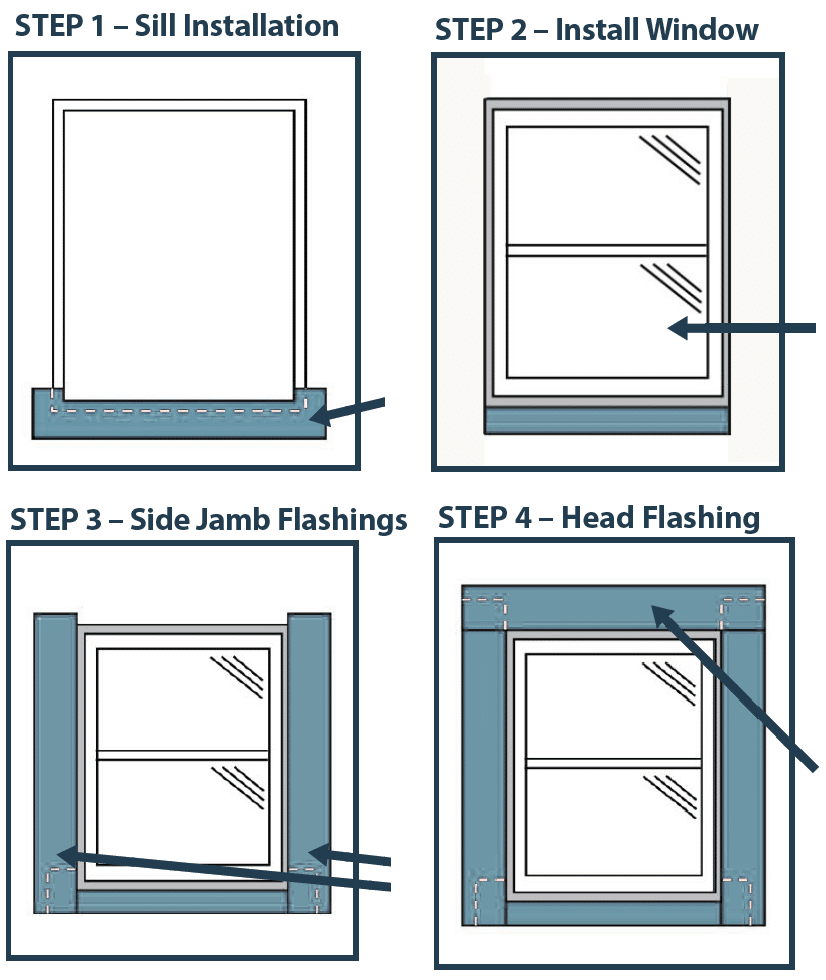
STEP 1 – Sill Installation
Attach the XtraFlash™ Membrane flashing to size of window opening adding 12” total to extend past either side of rough opening by 6”. Peal ½ of the release paper on back side of flashing allowing for easy installation. Apply to outside of window opening by sticking the butyl adhesive on flashing to the rough opening (do not secure bottom half of sill flashing backing intact for housewrap to tuck underneath for proper water drainage). XtraFlash™ Membrane flashing should be flush to the edge of the sill.
STEP 2 – Install Window
Install window as per manufacturer’s recommendation using 3/8’ bead of (XtraBond® 9500) sealant of all 4 sides of back side of window fin. Set the window. If sealant is used, ensure all excess sealant is removed from nailing flange and surrounding area to provide a smooth continuous substrate.
STEP 3 – Side Jamb Flashings
Cut XtraFlash™ Membrane Flashing to size of window side (jamb) openings adding 12” total to extend past upper and lower edge of rough opening by 6”. Peal the release paper on back side of flashing allowing for easy installation. Apply the precut flashing onto the nailing flange after the window has been installed; extend over the bottom sill flashing for proper drainage. Roll the flashing adhesive if necessary to create a tight bond. Repeat on both sides of window.
STEP 4 – Head Flashing
Apply pre-cut header XtraFlash™ Membrane Flashing on top of the window nailing flange by pealing the release paper on back side of flashing, exposing the butyl adhesive allowing for easy installation. Apply the precut flashing on top of the nailing flange extending 6” beyond each side of the window opening. Roll flashing firmly into place as necessary creating bond of flashing to opening sealing for any moisture intrusion – making sure top head flashing is installed over the 2 side flashing.
To learn more about XtraFlash™ Membrane Flashing, visit: https://premierbuildingsolutions.net/product/xtraflash-membrane-flashing/.


Leave A Comment